pfSense
The CrowdSec package for pfSense is not yet in the official pfSense Package Manager, so installation is done via a shell script. This page covers a verified, end-to-end installation on pfSense Plus 26.03 / FreeBSD 16 (CE 2.8.x on FreeBSD 14/15 also supported).
Three types of setup are supported:
Small (remediation only) — the pfSense machine receives blocklists from a Security Engine running on a different machine. Attacking traffic is blocked at the firewall by pfSense rules.
Medium (small + log processor) — in addition to enforcing blocklists, the pfSense machine can detect attacks directed at the firewall itself (port scans, SSH brute-force, GUI brute-force). Attack data is sent to a Security Engine running on a different machine.
Large (medium + LAPI) — deploy a fully autonomous Security Engine on the firewall and allow
other Log Processors to connect to it. Requires a persistent /var directory (no RAM disk) and
a slightly larger pfSense machine depending on the amount of data to process.
If you are not already a CrowdSec user, the Large setup is the easiest: just leave the default values to enable Remediation, Log Processor and Local API.
The CrowdSec configuration is not transferred when you restore a pfSense backup, and you'll need to reconfigure it or back up separately. Major pfSense upgrades may also require you to re-install or re-configure CrowdSec — verify it is running afterwards.
Installing the package
Open an SSH connection to your pfSense box, then download and run the install script:
# fetch https://raw.githubusercontent.com/crowdsecurity/pfSense-pkg-crowdsec/refs/heads/main/install-crowdsec.sh
# sh install-crowdsec.sh
The script is interactive and will ask three confirmations — answer y to each:
- A banner reminder to check the Package Manager first (the script is the correct path for now — answer y).
- Confirmation to download the release archive from GitHub.
- Confirmation to install the packages.
By default the script fetches the latest stable release automatically. To pin to a specific
version (beta or older), pass --release with the tag from the release page:
# sh install-crowdsec.sh --release v0.1.7-1.7.8-34
The tag encodes all three component versions: v<plugin>-<engine>-<bouncer>.
For example, v0.1.7-1.7.8-34 means:
pfSense-pkg-crowdsec0.1.7 — the pfSense plugincrowdsec1.7.8 — the Security Enginecrowdsec-firewall-bouncer0.0.34 — the34is the minor of0.0.x
When the script completes you will see:
# -------------- #
Installation complete.
You can configure and activate CrowdSec on your pfSense admin page (Package / Services: CrowdSec).
The packages print generic FreeBSD configuration instructions during installation. These can be safely ignored on pfSense — the pfSense plugin manages configuration and service startup.
Alternatively, you can download packages manually from the Assets section of a release and
install them in dependency order:
# pkg add -f <link to crowdsec-firewall-bouncer>
# pkg add -f <link to crowdsec>
# pkg add -f <link to pfSense-pkg-crowdsec>
The direct links are for the Community Edition of pfSense, architecture amd64. For ARM or a
different FreeBSD base version, the release assets contain .tar archives with packages for
all supported platforms.
Configuration
After installation, the services are not yet started. You must save the configuration via the pfSense web UI to activate CrowdSec.
Go to Services → CrowdSec. The options Remediation Component, Log Processor and
Local API should be enabled by default. Click Save.
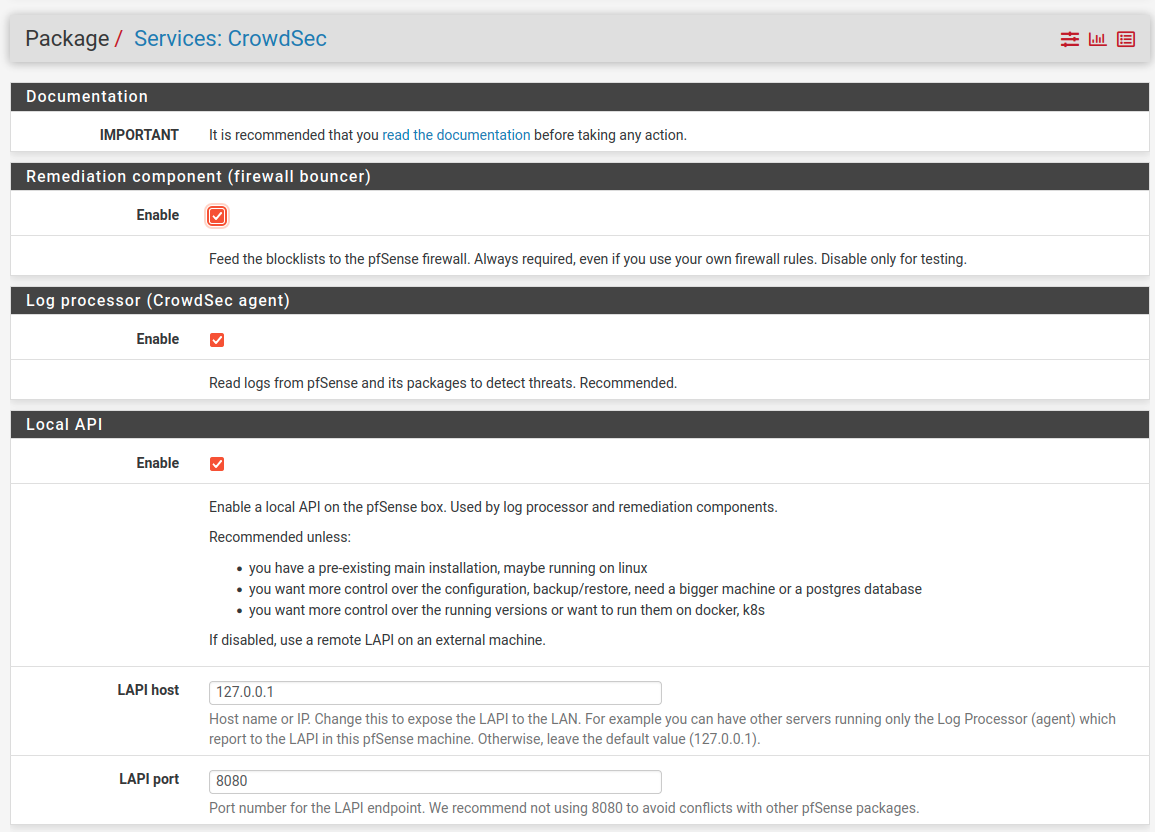
The default is a "Large", autonomous installation.
For a "Medium" or "Small" setup, you need credentials from the remote LAPI machine first.
Medium and Small: pre-registering on the remote LAPI
Before saving the pfSense config, run the following on the remote machine running the LAPI:
# For Medium (log processor + bouncer):
$ cscli machines add pfsense --auto -f -    # outputs login + password to stdout
$ cscli bouncers add pfsense-firewall       # outputs an API key

# For Small (bouncer only):
$ cscli bouncers add pfsense-firewall       # outputs an API key
Then in the pfSense GUI, disable Local API (and for Small, also Log Processor) and fill in the Remote LAPI section:
- Remote LAPI URL — e.g.
http://remote-address:8080/ - Login / Password — from the
cscli machines addoutput (Medium only) - Firewall bouncer API key — from the
cscli bouncers addoutput
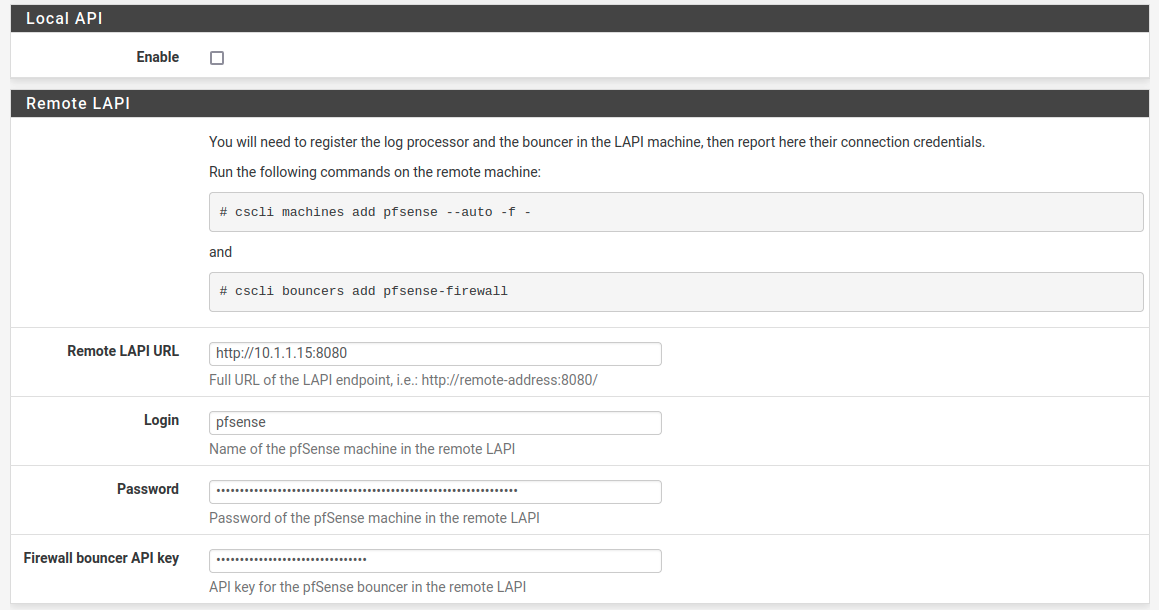
For a "Small", also disable Log Processor — no machine registration is needed in that case, only the bouncer API key.
RAM Disk: unless you disable Local API, ensure you are not using a RAM disk
for the /var directory. The persistent CrowdSec database and GeoIP tables are in /var/db.
If you need a RAM disk, you can still use the Log Processor and Remediation by connecting them
to a remote CrowdSec instance.
The Services → CrowdSec configuration page lets you manage all key settings: enable/disable
each component, set log levels, configure LAPI connectivity, and control which interfaces the
firewall rules apply to.
The status and metrics pages are read-only, with one exception: you can revoke individual
decisions (unban an IP) from Status → CrowdSec Status.
For anything not exposed in the UI — hub management, acquiring new log sources, custom
scenarios — use the shell or the CrowdSec Console.
Diagnostics → Command Prompt works as well as SSH for quick commands.
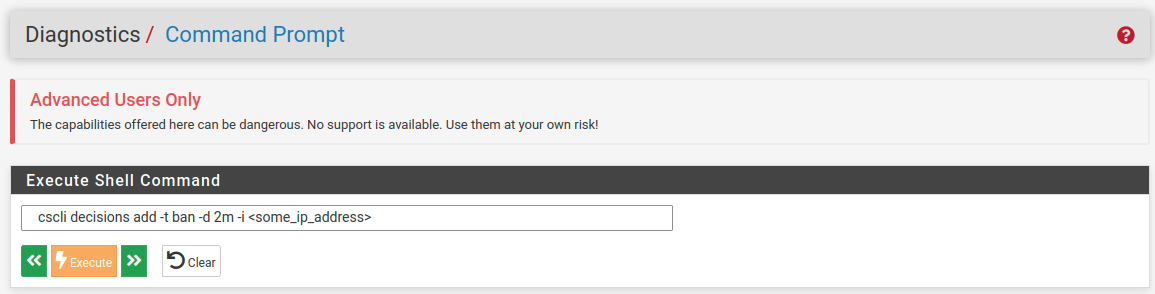
You are free to edit the files in /usr/local/etc/crowdsec, although some settings may be
overwritten by the pfSense package if they are mandatory.
Service Status
In Status → CrowdSec Status you can see:
- Registered Log Processors and Remediation Components
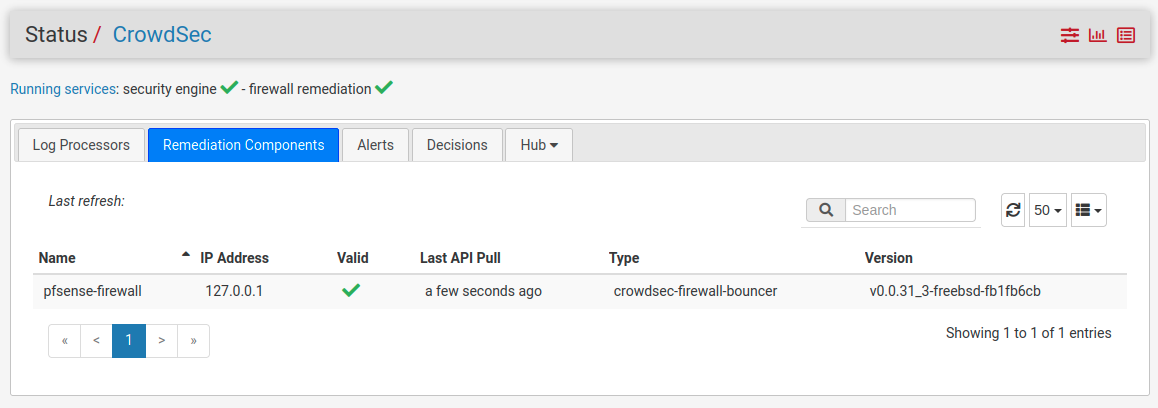
- Installed hub items (collections, scenarios, parsers, postoverflows)
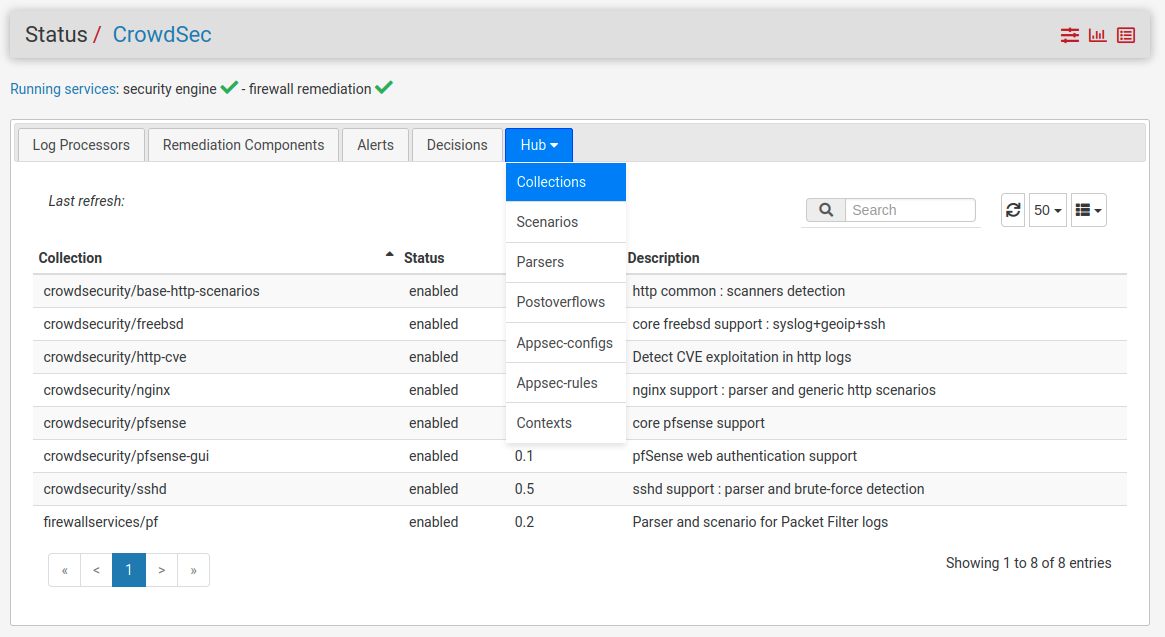
- Alerts and local decisions
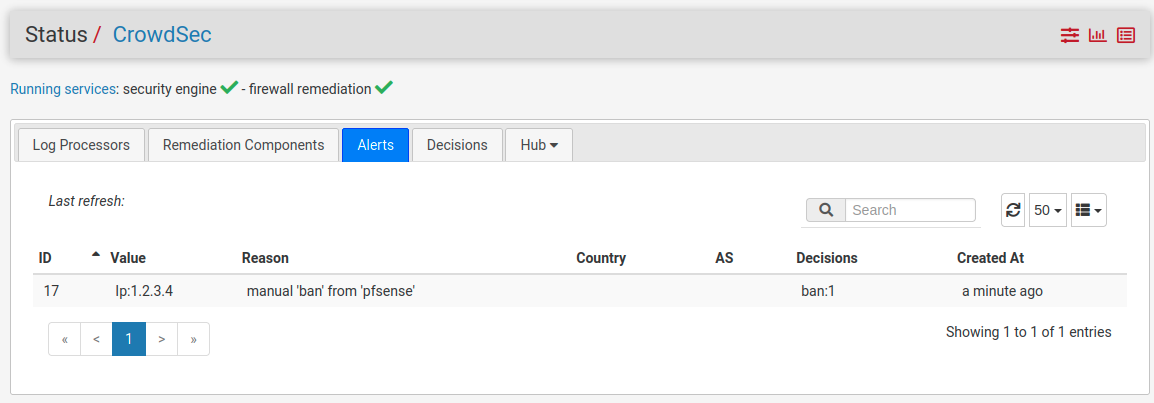
All tables are read-only with one exception: you can delete decisions one by one, to unban an IP. An IP may have been banned for several reasons, which count as separate decisions.
All hub items are periodically upgraded with a cron job.
Detecting attacks
If a Log Processor is running, the following scenarios are enabled by default:
- Port scan detection (
firewallservices/pf-scan-multi_ports) - SSH brute-force (
crowdsecurity/ssh-bf,crowdsecurity/ssh-slow-bf) - pfSense admin UI brute-force (
crowdsecurity/pfsense-gui-bf) - HTTP vulnerability probing (via
crowdsecurity/base-http-scenariosandcrowdsecurity/http-cve)
These will trigger a ban on the attacking IP (4 hours by default) and report it to the CrowdSec Central API for inclusion in the Community Blocklist.
You can add scenarios to detect other types of attack on the pfSense server, or connect several log processors to the same LAPI node. Other types of remediation are possible (e.g. captcha test for scraping attempts).
If disk space is not an issue, you can increase the maximum size of log files before they are compressed and rotated. Larger log files help diagnostics when you need to match application behavior with acquired log content.
We recommend you register to the Console, especially if you protect several machines.
Processing logs
If a collection, parser, or scenario can be applied to software running on pfSense, add it
with cscli collections install ..., then configure where CrowdSec will find the logs.
New acquisition files should go in /usr/local/etc/crowdsec/acquis.d/. See pfsense.yaml
for an example. Two options are set in the default configuration:
poll_without_inotify: true— required when log sources are symlinks.force_inotify: true— required to watch for directory and file creation (important when/var/logis in RAM and log directories are created after CrowdSec starts).
Make sure to reload or restart CrowdSec when you add new data sources.
Running cscli metrics show acquisition will typically show a high "unparsed" rate for
/var/log/filter.log. This is expected: CrowdSec only processes pf log entries relevant to
its scenarios (e.g. port scans). The majority of firewall log entries are intentionally not
parsed.
Diagnostics
Under Diagnostics → CrowdSec Metrics you can check if logs are acquired and events are
triggered correctly.
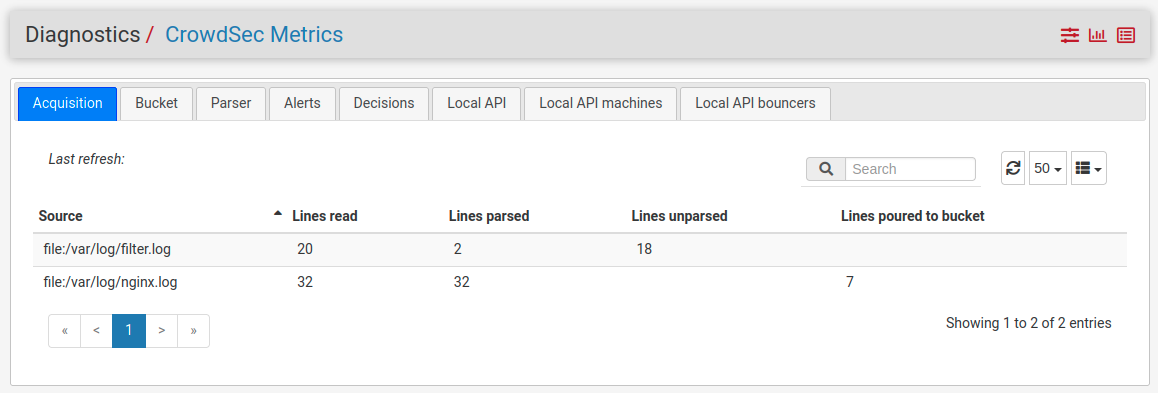
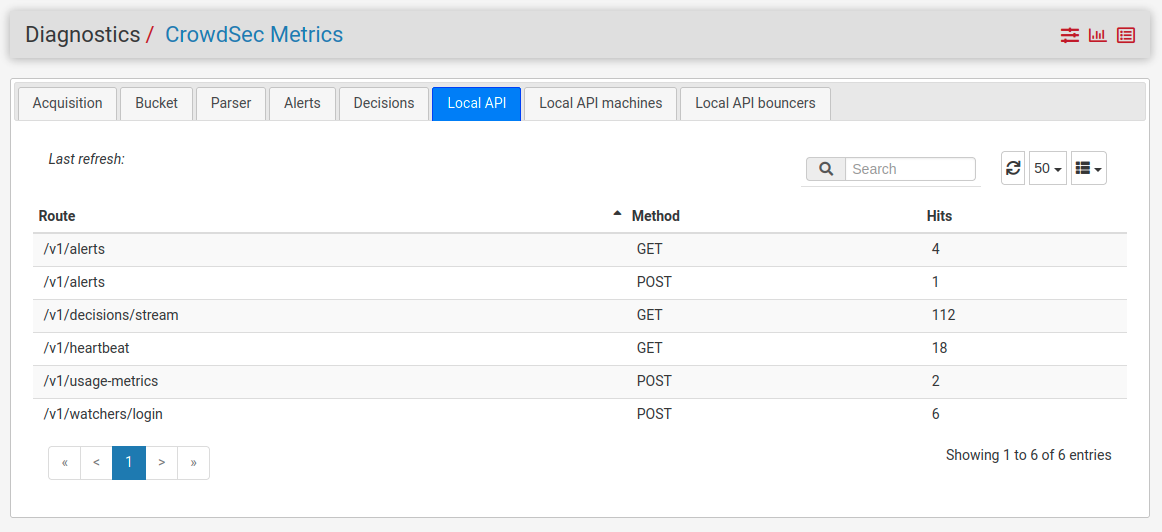
For real monitoring, you can fetch the same metrics with Prometheus (Grafana dashboard included), Telegraf, or your preferred solution.
If you are not running a LAPI or a Log Processor, some metrics will always be empty.
Logs
The Security Engine logs are visible in Status → System Logs → Packages → crowdsec.
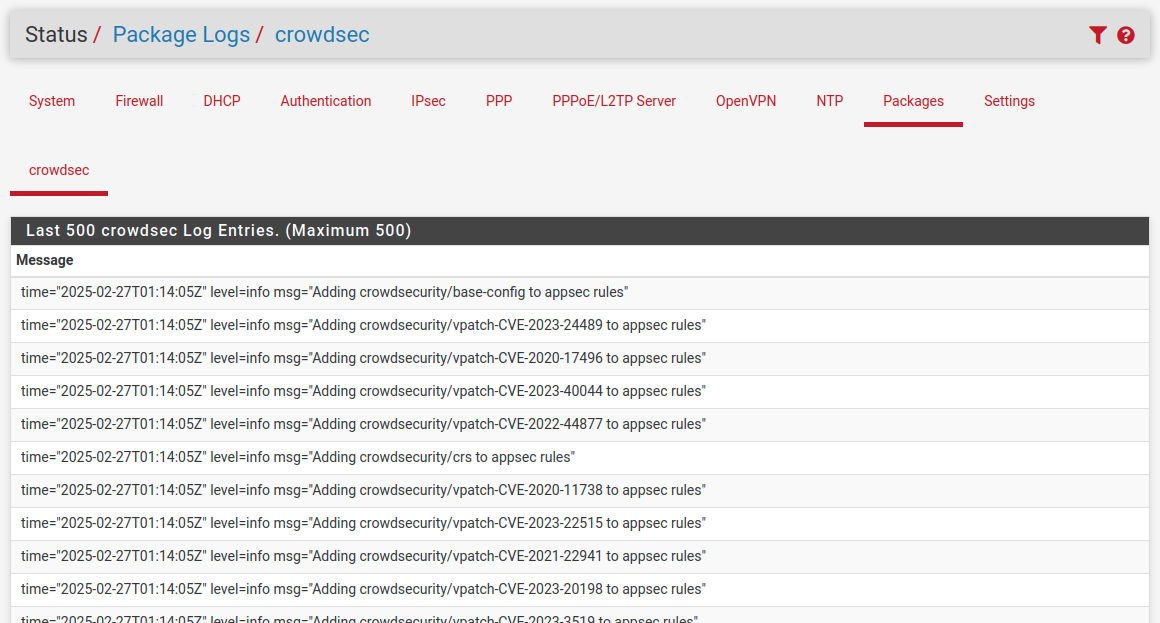
Other logs not shown in the UI:
/var/log/crowdsec/crowdsec_api.log— Local API log/var/log/crowdsec/crowdsec-firewall-bouncer.log— Firewall bouncer log/var/log/crowdsec/crowdsec.log— Security Engine log (also shown in the UI above)
Service Management
Both services — Security Engine (crowdsec) and Remediation (crowdsec-firewall-bouncer) —
can be controlled from Status → Services.

The equivalent shell commands are:
# service crowdsec start|stop|restart|status
# service crowdsec_firewall start|stop|restart|status
If the service command requires the .sh suffix (as in some pfSense contexts):
# service crowdsec.sh start|stop|restart
# service crowdsec_firewall.sh start|stop|restart
Note: the .sh form only supports start, stop, and restart — use the form without .sh
to check running status.
Viewing blocked IPs
You can see the tables of blocked IPs in Diagnostics → Tables.
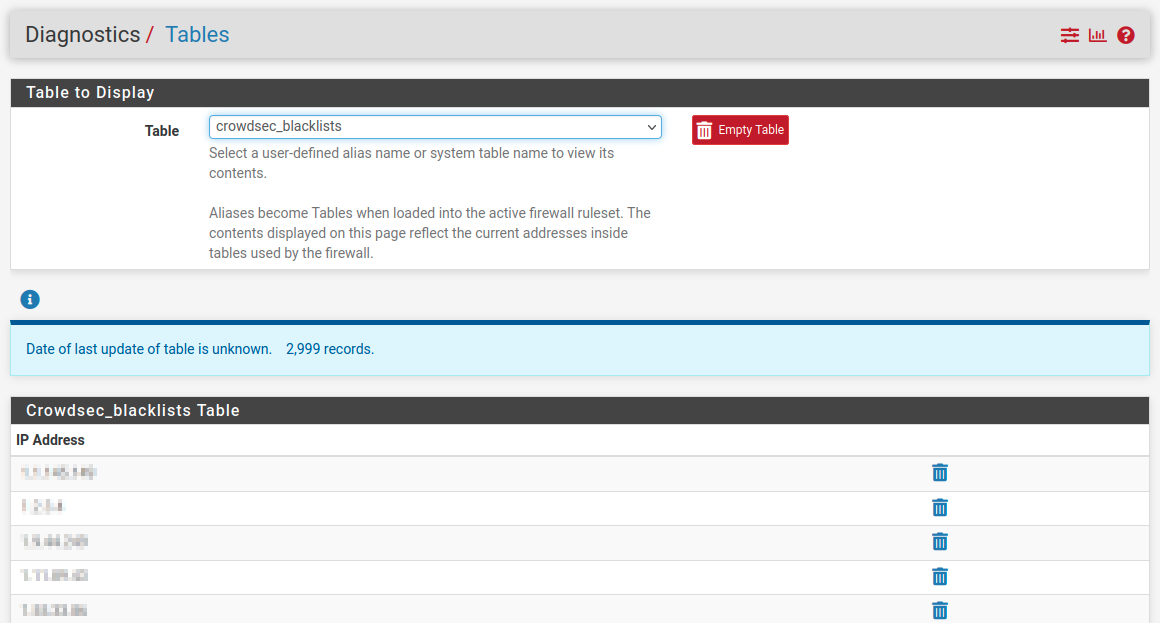
Or from the shell:
# pfctl -T show -t crowdsec_blacklists      # IPv4
# pfctl -T show -t crowdsec6_blacklists     # IPv6
To show the same data with more context:
# cscli decisions list -a
Testing
A quick way to test that everything is working end-to-end is to ban your own IP address:
# cscli decisions add -t ban -d 2m -i <your_ip_address>
Your SSH session should freeze and you should be kicked out from the firewall. You will not be able to connect from the same IP address for two minutes.
It might be a good idea to have a secondary IP from which you can connect, should anything go wrong.
You may need to disable the Anti-lockout rule in System → Advanced → Admin Access for
the duration of the test.
This is a safer way to test than attempting to brute-force yourself: the default ban period is 4 hours, and CrowdSec reads logs from the beginning, so it could ban you even if you failed SSH login 10 times in 30 seconds two hours before installing it.
Note that the Login Protection service, which is enabled by default on pfSense, may trigger and block a brute-force attacker before CrowdSec does, because it is more sensitive. Attacks not detected by Login Protection will still be detected by CrowdSec and shared. If you need more CrowdSec tests you may want to temporarily disable Login Protection depending on the scenario.
LAN / private networks whitelist
Since CrowdSec 1.6.3, private IP networks are whitelisted by default. An IP from a LAN or WAN
in the 192.168.x.y range will not be blocked by a local decision (community blocklists do not
contain private IPs).
To revert to the previous behavior and allow blocking private IPs, remove the related parser:
# cscli parsers remove crowdsecurity/whitelists
If you upgrade from a version before 1.6.3, you need to install the whitelist yourself:
# cscli parsers install crowdsecurity/whitelists
Uninstalling
In most cases, remove the crowdsec package from System → Package Manager → Installed Packages, or run the installation script with the --uninstall option:
# sh install-crowdsec.sh --uninstall
This does not remove the database or configuration files, in case you want to reinstall later.
To remove all traces of CrowdSec:
# pkg remove pfSense-pkg-crowdsec crowdsec crowdsec-firewall-bouncer
# rm -rf /usr/local/etc/crowdsec /usr/local/etc/rc.conf.d/crowdsec*
# rm -rf /var/db/crowdsec /var/log/crowdsec* /var/run/crowdsec*
For testing purposes, you may also want to remove the <crowdsec> section from
/conf/config.xml.